Provided by RLE Technologies
![]()
Kele offers a variety of products from RLE Technologies, including the LD2100 Web-Accessible Leak Detectors. RLE published the following leak detection checklist and user guide for guarding your facility against catastrophic water damage and downtime. Read on to learn more.
Every facility has unique monitoring needs based on its susceptibility to water or chemical leak damage.
RLE Technologies presents a leak detection checklist to help safeguard your business against the possibility of severe water damage and its consequences for your business. This checklist will help you identify threats and problem areas in your facility, consider your best solutions, and be proactive in averting a disaster before it happens.
After all, the correct monitoring and notification system can help prevent facility downtime, and the cost of the wrong system or no system at all can be startlingly high. Don’t be the one to pay that price.
Want to dig deeper? Check out the accompanying checklist guidelines below.
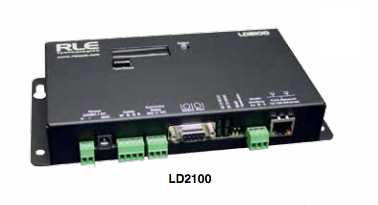
RLE Technologies Featured Product
The RLE Technologies LD2100 Web-Accessible Leak Detectors monitor up to 5000 ft (1524m) of sensing cable. The LED display provides basic information about alarm conditions, while a browser offers a convenient way to configure the unit, access and acknowledge alarms, and view alarm logs. Output communications include a Form C relay, SNMP, Modbus and BACnet. SMTP allows for direct email alarm notification which can be routed to cell phones, PDAs, or other wireless devices. Shop now.
LEAK DETECTION CHECKLIST GUIDELINES
Section 1: Identifying Threats & Their Sources
Let’s start by taking a more in-depth look at why each item on the list could be considered a threat and what you need to be on the lookout for. These are, particularly the spots where a small amount of damage can quickly become a very large problem, unless you catch it early.
No facility can be served by one long, single pipe, and anywhere two (or more) pipes meet, leaks are possible. Time and wear can deteriorate and break the seals and, left unchecked, small leaks can become big leaks and cause significant damage.
Failing or freezing pipes
Frozen fluids expand with enough force to crack plastic, copper, or even steel pipes. When that frozen water thaws, the resulting leaks can cause damage not only to the pipes and fittings but also to the walls around them. (P.S. This isn’t just external pipes; if your heating system goes down, any pipe runs the risk of freezing.)
At-risk water supply or return lines
There are a number of risks that your pipes may encounter: freezing, water hammer, age, physical damage. Think about the environment that surrounds your pipes and what dangers exist. For example, be aware of the pipes that feed into overhead sprinklers. Those sprinklers are prone to damage and are a weak spot in your water system.
Uncapped sprinkler lines
Like we said, these things are dangerous. Though it’s infrequent, when repairs are made to overhead fire suppression systems, sprinkler heads can be left uncapped. The result is an open water line that can spew a tremendous volume of water very quickly. Know where your sprinklers are and be aware of any maintenance they undergo.
Clogged drains
Drains that don’t drain aren’t only a danger to the rooms they’re in but also to the rooms adjacent or below. Note drain placement when you’re surveying your most critical rooms and facilities and consider what might be seeping or dripping into them.
Leaky roofs and small drips
Common sense tells you that a faulty roof is going to be a leak problem. It’s pretty much unavoidable, but it’s up to you (and your leak detection system) to catch it before it becomes a catastrophe.
Primary plumbing walls
These so-called “wet walls” are one your facility’s biggest vulnerabilities. It’s a wall that carries your main water lines, draining to most kitchens, bathrooms, and other wet rooms. No water damage to a wet wall is going to remain small for long, and the effects of freezing, water hammer, or physical damage will grow at exponential speeds. Know where they are and keep a close eye on them.
While you’re at it, think about the placement of your water-bearing equipment too. Icemakers and their ilk can be trouble.
Windows improperly installed or located
Like a leaking roof, there’s not much you can do to prevent these, but you can spot and monitor them before they become a more serious problem.
Faulty construction
Ditto. The dangers here are varied: roof leaks to windows to primary water line failure. Apart from thoroughly checking out your contractor, you can’t stop it from happening. You can only mitigate the risks with an effectively placed leak detection system.
Fluid/water hammer effect
Caused by improperly installed plumbing, water hammer effect is the rattling of pipes against the walls, shaken by the force of fluids flowing through a pipe. Listen for it when you shut off a faucet quickly, abruptly halting the water’s momentum. Hammer effect itself doesn’t cause leaks, but it does cause wear and tear on your pipes over time. Catch it quickly and you’ll save yourself a lot of potential damage.
Any number of things can go wrong with a storage tank: failed walls, overflow, valve malfunction, sabotage, and more. One small weakness in one large tank can mean a huge release of fluid, very quickly.
Nearly all HVAC units use fluids to operate, and a supply line failure can cause a significant leak. This is another highly common cause of damage that can be quickly caught with the right leak detection equipment.
Section 2: Encapsulate Areas of Concern
This section doesn’t require much in the way of extra explanation. Once you know what you’re looking for (that’s what Section 1 is for), we want to make sure that you’re looking at your whole facility for those potential problem areas.
Know your weak spots. Where in your facility would water damage cause dangerous downtime or other operating problems? What equipment is particularly susceptible to water or chemical damage?
Then, make sure you’re thinking of your building in 3D. What’s above and below your most critical areas, like your IT room? Do you have raised floors or suspended ceilings? What’s hidden from sight but accessible to insidious little streams of water?
Know where the water comes from and then think like water. Where would you go?
Get a map of your building or make a list of all the spots that absolutely must have some kind of leak detection. If you’re afraid you won’t be able to afford a comprehensive solution right away, prioritize them based on where damage will do the most, well, damage. What rooms or pieces of equipment are critical to your facility’s uptime?
Once you’ve got your list, think about what kind of problems are most likely to affect each area. Is the potential for fluid damage isolated to one spot or is it a more general threat?
Section 3: Determine the Best Solution
Once you know what you’re facing, it’s time to start figuring out what your ideal leak detection system would look like.
Identify your long-term leak detection goals
Start by thinking about the big picture of what you want your leak detection to accomplish. What are the big things that can be affected by potential fluid damage? Do you want to reduce risk? Increase facility uptime? Ensure that the resources you provide your customers are always available? Reduce insurance costs?
Keep these in mind while you’re choosing your system. They will affect the decisions you make.
Establish your immediate needs
This is the natural outcome of that list you made or map you marked. What sensitive spaces are most in need of protection and what are their most common vulnerabilities? What do you need right now?
Consider future scalability
Whether you can’t afford a whole system right away or whether you foresee a future where you’ve expanded or want to tie multiple facilities into a unified solution, scalability is a concern. Think about the capabilities of any system you’re considering.
Can you add wireless leak detection for outbuildings or other remote locations? Will it be easy to retrofit additional leak detection when you’re ready to expand? Can you nest your leak detection controllers to report to central units as you grow? Can you branch a leak detection cable to easily add extra arms?
Understand your budget restrictions
As we’ve said before, if you’re leak-detecting on a budget, focus on the primary risk areas first: storage tanks, wet walls, and A/C units. Protect the heck out of those soft underbellies. You can go back and add broad protection later.
With the broader protections, you can also start simple: put in zone leak detection that can quickly tell you when there is a leak, even if it can’t tell you the exact location. The best systems will allow you to go back at any time and easily add a distance read controller to pinpoint the exact location along any length of cable. RLE systems provide this capability.
Don’t be discouraged. You have options. Leak detection is not an all-or-nothing proposition.
Calculate the cost of doing nothing
This is a common scenario we’ve encountered in our long years of leak detection:
There’s a small leak under a raised floor. It goes unnoticed for a few days. It isn’t until Friday night, when everyone’s left the building, that the drip grows to a gush, weakening the barrier between this level and the floor below. The gush quickly escalates into a waterfall, which not only floods the room beneath but also spreads into adjacent rooms. Before long you’ve got a mess below and small-drips-destined-to-grow in the rooms on either side.
No one knows anything is wrong until Monday morning. By then, the damage is done and catastrophic: equipment destroyed, room off-limits until the property damage is fixed, business lost, and morale lowered in the hubbub.
Or, your scenario could look like this:
There’s a small leak under a raised floor. It hits a length of leak detection cable. Less than 10 seconds later, an alarm goes off, telling the designated monitoring personnel where the leak is, to the inch. Even if nobody is there to hear it, the system sends a text message and email to the person who can solve the problem. He grabs a roll of paper towels, mops it up, finds the source, and fixes it.
Which would you prefer?
Determine the best warning system and interface for your team
The checklist gives you some good tips for this. Here are a few other considerations:
- Check with your insurance company. Some offer rate discounts for facilities with leak detection in place.
- Check the response time of the equipment you’re considering. Minutes – and even seconds – do matter.
- Think about the ease of installation and use. Is the user interface easy to set up and interpret?
- Make sure you’re choosing the right cable for your circumstances. If chemical leaks are a high risk, you may want corrosion-resistant cable. If rats like to nibble on your cables, keep an eye out for rodent-resistant cable.


